


7 Essential Photography Backdrop Tips for Stunning Shoots
Choosing the best backdrop for your photography session can feel overwhelming. The wrong material, size, or theme may distract from your subject or limit your creative options. If you have ever wasted time struggling with wrinkles, stubborn stains, or unflattering shadows, you know how much these issues can undermine your results and confidence.
This guide delivers practical solutions to common challenges by focusing on actionable techniques used by professionals. You’ll learn how to match backdrop materials and styles to your shoot’s purpose, use lighting to highlight textures, and keep your backgrounds clean for flawless images.
Get ready to discover proven tips that put you in control of your creative environment. Each insight is designed to help you create images that stand out and make every shoot more efficient and rewarding.
Table of Contents
- 1. Choose The Right Backdrop For Your Subject
- 2. Use Lighting To Enhance Backdrop Texture
- 3. Keep Backdrops Clean And Stain-Free
- 4. Position Your Subject For Minimal Shadows
- 5. Utilize Large Sizes For Versatile Framing
- 6. Experiment With Different Background Themes
- 7. Store And Transport Vinyl Backdrops Safely
Quick Summary
| Key Message | Explanation |
|---|---|
| 1. Choose an Appropriate Backdrop | Select a backdrop that enhances your subject, considering the purpose and mood of the shoot for effective visuals. |
| 2. Control Lighting for Texture | Use strategic lighting to highlight backdrop texture, adding depth and professionalism to your compositions. |
| 3. Maintain Backdrop Cleanliness | Regularly inspect and clean your backdrops to ensure professional quality in every image, preventing distracting blemishes. |
| 4. Position Subjects Wisely | Keep subjects at least three feet from the backdrop to minimize shadows and maintain focus on the subject. |
| 5. Invest in Large Backdrops | Large backdrops provide versatility for different compositions and shooting scenarios, ensuring you avoid cropping subjects awkwardly. |
1. Choose the Right Backdrop for Your Subject
Your backdrop choice can make or break a shoot. The right background enhances your subject, while the wrong one competes for attention and distracts viewers from what matters most. Selecting a backdrop starts with understanding what you’re photographing and what mood you want to create.
Different subjects demand different approaches. Portrait photography thrives with soft, muted tones that keep focus on facial features and expressions. Pastel colors and neutral backgrounds work beautifully here because they complement skin tones without overwhelming the frame. Product photography requires cleaner, more controlled backgrounds that emphasize shape, texture, and color of what you’re selling. Bold colors work well for lifestyle shots and editorial content, while material characteristics like durability and texture determine how long your backdrop serves your needs.
Here’s what changes your backdrop decision:
- Your shoot’s purpose - Is this for e-commerce, portraits, fashion, or food photography? Each demands different visual treatment
- Subject characteristics - Dark products pop on light backgrounds, while light items need darker backdrops for contrast
- Desired mood and style - Professional and corporate calls for restraint, while creative work welcomes boldness
- Your lighting setup - What works beautifully in natural light may look flat under studio strobes
- Practical constraints - Budget, storage space, and how portable you need your backdrop affect material selection
Matching your backdrop to your subject’s visual needs transforms ordinary shots into professional-looking images that command attention.
When you photograph jewelry or luxury goods, a marble or stone backdrop adds sophistication without stealing focus. Food photography benefits from textured surfaces like aged wood that add visual interest while staying secondary to the dish itself. Clothing shoots often use bold backdrops that complement the garment’s colors or create intentional contrast that makes the fabric pop.
The research on backdrop selection shows that a structured approach including defining purpose, knowing material characteristics, and matching style with goals delivers consistent results across diverse projects. When you know exactly why you’re choosing a specific backdrop, setup becomes faster and creative decisions become clearer.
Pro tip: Test your chosen backdrop with your actual lighting setup before committing to a full shoot, since how materials reflect light varies dramatically between natural windows and studio strobes.
2. Use Lighting to Enhance Backdrop Texture
Your backdrop’s texture only matters if light reveals it. A beautifully textured surface under flat, even lighting looks dull and lifeless. The right lighting transforms a flat backdrop into a dynamic visual element that adds depth and professionalism to your shots.
Texture becomes visible through contrast between light and shadow. When light hits a surface at an angle, it creates highlights on raised areas and shadows in valleys, making weave patterns, fabric grain, and surface irregularities pop. This directional approach adds dimension that viewers perceive as quality and craftsmanship. Without strategic lighting, even premium backdrops with rich textures flatten into undifferentiated backgrounds.
Here’s how lighting placement changes your backdrop’s impact:
- Angled directional light emphasizes fabric weave and surface details, creating visual interest without harshness
- Soft, diffused lighting preserves texture subtlety while minimizing harsh shadows that distract from your subject
- Light height and position determine which textures become visible and which fade into shadow
- Three-point backdrop lighting balances highlights and shadows for dimensional depth
- Distance from backdrop controls how pronounced texture appears in your final image
Strategic light placement enhances the backdrop’s presence without competing with your subject. When you position lights to catch fabric texture at the edges or use a dedicated backdrop light separate from your main subject lighting, the background gains presence and sophistication. This layered approach lets viewers see depth and dimension rather than a flat color.
Well-lit texture transforms your backdrop from scenery into a compositional element that elevates your entire image.
Consider your depth of field as part of the texture strategy. A shallow depth of field keeps backdrop texture soft and subtle, preventing distraction. A deeper depth of field reveals texture detail, making the background richly detailed and immersive. Your subject remains the focal point either way, but the backdrop contributes more intentionally to the overall mood.
For product photography, adjusting light placement and depth of field together controls how much backdrop texture viewers see. A luxury watch on a marble backdrop shines brighter when soft side lighting reveals marble veining without overwhelming the timepiece. Food on a wooden surface gains warmth and authenticity when angled light catches wood grain just right.
Start by positioning a light source 45 degrees to one side of your backdrop, angled slightly downward. Observe how this reveals texture without creating distracting hot spots. Adjust distance and angle until texture feels present but not dominant. This takes minutes to dial in but makes a measurable difference in how professional your shots appear.
Pro tip: Use a dedicated backdrop light separate from your main subject lighting so you can adjust backdrop texture independently, giving you full creative control without casting unwanted shadows on your subject.
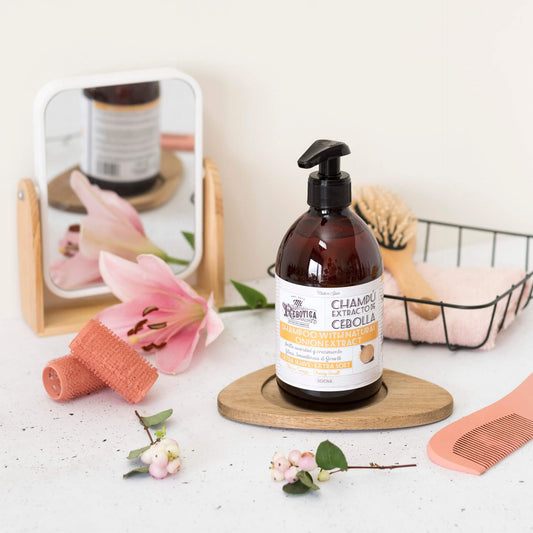
3. Keep Backdrops Clean and Stain-Free
A single smudge, coffee splash, or dust particle can ruin an otherwise perfect shot. Your backdrop cleanliness directly impacts image quality and your professional reputation. Investing time in maintenance ensures every session produces pristine results without editing around visible flaws.
Dirt and stains behave differently depending on your backdrop material. Vinyl backdrops resist most spills and wipe clean instantly, making them ideal for food and product work. Fabric catches dust in its weave and requires careful handling. Paper backdrops show every mark and crease, demanding replacement when damaged. Understanding your material’s vulnerabilities helps you develop cleaning routines that actually work.
Establish these maintenance habits before problems occur:
- Inspect before every shoot for dust, wrinkles, stains, or discoloration that editing cannot fix
- Wipe vinyl surfaces with a damp microfiber cloth to remove spills and dust without damaging the print
- Steam fabric backdrops to remove wrinkles and refresh the material between uses
- Store properly in a cool, dry place rolled or hung to prevent creasing and mildew
- Replace damaged paper promptly since repairs are visible and compromise professionalism
- Keep backdrops away from direct sunlight to prevent fading and discoloration over time
When you’re shooting on vinyl backdrops for product photos, cleanliness becomes non-negotiable. Food photography brings oil splatters. Product work brings dust and fingerprints. Jewelry shoots reveal every particle of lint. A quick cleaning routine between setups prevents accumulated grime from appearing in your final images.
Clean backdrops deliver consistent results across multiple sessions and eliminate post-processing headaches that steal your editing time.
Timing matters when you clean. Address spills immediately before they set into the material. Check for dust before positioning your subject rather than noticing it later in post-processing. A five-minute cleaning takes less time than removing stains from dozens of images afterward.
Storage practices extend your backdrop’s lifespan dramatically. Rolling fabric backdrops prevents creasing better than folding. Hanging vinyl on a rack keeps it flat and accessible. Storing everything in a clean, dry space protects against moisture damage and mold growth. You’ll notice the difference within a year of consistent care.
Paper backdrops require different handling since replacement is the realistic maintenance approach. Rather than fighting to keep a paper backdrop pristine through multiple shoots, budget for replacement after a set number of uses. This accepts the material’s limitations while ensuring you always shoot on a flawless surface.
Pro tip: Keep microfiber cloths and a small spray bottle of distilled water in your camera bag so you can spot clean your backdrop during shoots before issues become visible in your images.
4. Position Your Subject for Minimal Shadows
Ugly shadows creeping across your backdrop distract viewers and ruin compositions. Strategic subject positioning prevents harsh shadows from appearing on your background, keeping focus where it belongs. This simple spatial adjustment transforms your lighting setup from problematic to professional.
Shadows fall on your backdrop when your subject sits too close to it. Light hitting your subject casts a shadow directly onto the background behind it, creating a dark shape that competes with your intended backdrop. Moving your subject away from the backdrop breaks this direct shadow line. The farther your subject sits from the background, the softer and less defined the shadow becomes, eventually disappearing entirely from the frame.
Understand how distance controls shadows:
- Close positioning creates sharp, dark shadows that look unprofessional and distract from your subject
- Three to five feet of separation typically eliminates visible shadows while maintaining backdrop visibility
- Greater distance allows shadows to fall beyond your frame or become too soft to notice
- Angle matters as much as distance, since lights positioned behind and above your subject cast shadows downward rather than onto the backdrop
- Multiple light sources scatter shadows in different directions, preventing one dominant dark shape
Careful lighting placement and subject positioning ensure minimal distractions and clean separation between your subject and background. When you position your subject several feet away from the backdrop, you gain flexibility with lighting angles. You can add backlighting without it creating obvious shadows. You can use side lights for dimension without harsh backdrop marks. This spatial buffer transforms your lighting options.
Distance between subject and backdrop is your most powerful shadow control tool, more effective than fighting shadows with additional lights.
Consider your specific subject type. Small products can sit close to the backdrop since they cast minimal shadows even when near. Fashion shoots benefit from more separation because bodies cast larger shadows that are harder to control. Food photography demands distance because dishes and props create complex shadow patterns that compound when positioned too close.
Diffusers and multiple light sources complement positioning strategy. When you combine subject-to-backdrop distance with soft, diffused lighting, shadows become so subtle they disappear entirely. A softbox between your main light and subject spreads illumination across a wider area, preventing concentrated shadow formation. Back lights and rim lights separate your subject from the backdrop, creating natural edge separation that eliminates shadow problems altogether.
Take this approach to your next shoot. Position your subject at least three feet from the backdrop as your starting point. Observe where shadows fall. Adjust subject position forward or backward until shadows disappear or become acceptably soft. Then adjust your lighting to enhance this clean separation. You’ll notice how much faster your editing process becomes when shadows aren’t a problem to fix in post-processing.
Pro tip: Mark your optimal subject-to-backdrop distance on the floor with tape so you can consistently position subjects in the same spot across multiple shots, ensuring shadows remain consistent throughout your session.
5. Utilize Large Sizes for Versatile Framing
A backdrop that’s too small forces you into compositional corners. Large backdrops give you freedom to shoot in multiple ways without scrambling to hide edges or reposition constantly. This versatility translates directly into faster, more efficient shoots with greater creative control.
Backdrop size determines what you can frame in a single shot. A small backdrop works fine for tight product closeups or headshots, but the moment you want a full-body portrait or a group photo, edges creep into your frame. Large backdrops eliminate this problem entirely. You can shoot full-body, step back for environmental context, or zoom in for detail shots all from the same backdrop setup without repositioning.
Here’s what larger sizes unlock:
- Full-body portraits become possible without cropping off feet or heads
- Multiple subjects fit comfortably without anyone standing at awkward angles near edges
- Wide-angle lenses work without capturing the backdrop edge or external distractions
- Creative framing allows you to compose shots with breathing room rather than fighting space constraints
- Environmental context appears naturally in the frame, showing your subject within the backdrop rather than plastered against it
- Pose variety expands dramatically when subjects have room to move naturally
Large sizes facilitate multiple setups and accommodate wide-angle lenses or creative compositions without visible edges. For e-commerce sellers shooting product collections, a larger backdrop means photographing multiple items together or showing products in context. Fashion photographers gain room for dynamic poses and full-outfit shots. Food photographers can style scenes with props and plating that extends beyond tight product boundaries.
Larger backdrops prevent unwanted background elements from appearing in your frame, giving you complete control over what viewers see.
Size also provides insurance against mistakes and creative pivots. You frame a portrait tightly, then the client wants a wider shot. With a large backdrop, you simply step back without repositioning anything. You start with one product arrangement, then decide to add complementary items. Enough backdrop space accommodates the change without visible edges.
Consider your typical shooting styles and subject types when choosing size. If you mostly photograph jewelry or small products, you can use moderate sizes. If you work with fashion, groups, or lifestyle content, larger backdrops become non-negotiable. The ideal approach is choosing the largest size your space and storage allow, since versatility compounds over time. You’ll discover new ways to use extra space as you work.
Backdrop size should complement your studio space and subject size while preventing unwanted background elements from appearing beyond the edges. This means measuring your workspace carefully. A ten-by-twenty backdrop requires adequate distance to actually use it fully. A smaller space might work better with eight-by-ten dimensions that still provide versatility without overwhelming your setup.
The flexibility of large backdrops justifies the investment. You purchase once and adapt it to dozens of shooting scenarios. A single large marble backdrop serves product photography, lifestyle content, fashion shoots, and portrait work. This adaptability means fewer backdrops in your collection, less storage required, and more consistent branding across your portfolio.
Pro tip: Invest in the largest backdrop size your space can accommodate, as the added versatility pays dividends across countless shoots and creative pivots you’ll make over years of use.
6. Experiment with Different Background Themes
Using the same backdrop repeatedly limits your creative potential and makes your portfolio feel repetitive. Exploring different background themes allows you to tell varied stories and develop a distinctive visual voice. Each theme opens new possibilities for how you present your subjects and engage your audience.
Backdrop themes create emotional context for your images. A weathered wood backdrop evokes warmth and authenticity. Marble suggests luxury and professionalism. Abstract textures communicate creativity and modernity. These moods aren’t accidental. They’re powerful tools that shape how viewers perceive and connect with your work. By intentionally varying your themes, you control the narrative each image tells.
Consider these thematic directions:
- Natural scenes like wood, stone, and foliage create organic, approachable vibes
- Artistic textures from abstract paint to geometric patterns communicate innovation and boldness
- Solid colors in strategic hues evoke specific emotions while keeping focus on your subject
- Vintage or aged finishes add character and nostalgic warmth to compositions
- Modern minimalist designs project sophistication and contemporary style
- Decorative walls with patterns or architectural interest add visual complexity
Experimenting with background themes allows photographers to tell different visual stories and create moods aligned with the shoot concept. A jewelry brand’s luxury collection shoots beautifully on marble, while their approachable everyday line works perfectly on soft, neutral backdrops. Fashion brands targeting different demographics choose themes that match their audience’s values and aspirations. Food brands use rustic wood for artisanal positioning and clean, bright surfaces for modern health-focused messaging.
Diverse backdrop themes keep your visual work fresh, engaging viewers and preventing creative stagnation across your portfolio.
Thematic coherence matters as much as variety. Your backdrop choice should reinforce your subject’s message. Don’t pair a luxury watch with a weathered barn background unless that contrast serves an intentional creative purpose. When backdrop and subject align, the image tells a unified story. When they clash without reason, viewers sense something is off.
Color psychology and thematic coherence with the subject’s style enhance your storytelling and shape viewer perception. Warm earth tones support comfort and tradition. Cool blues and grays communicate calm and professionalism. Vibrant colors energize and draw attention. Understanding these psychological associations helps you choose themes that amplify your intended message.
Start building a themed backdrop collection strategically. Rather than random choices, identify three to five core themes that align with your typical work. A product photographer might invest in marble, wood, white, and concrete. A portrait photographer might choose soft pastels, dark neutrals, and textured fabrics. This focused approach means you’re prepared for varied requests without overwhelming storage or budget.
Experimentation also reveals unexpected winners. A backdrop you think will work for one purpose might become your signature for something entirely different. The only way to discover these possibilities is to try themes across different subjects and lighting setups. Document what works. Notice which themes receive client praise and which feel stale in your portfolio.
Pro tip: Before investing in multiple large backdrops, test themes using smaller sample pieces or digital backgrounds to identify which themes genuinely resonate with your style and client preferences.
7. Store and Transport Vinyl Backdrops Safely
Vinyl backdrops represent significant investments in your photography business. Proper storage and transport protect these expensive materials from damage that can render them unusable. Smart handling practices extend your backdrop lifespan and keep them looking pristine for years of professional work.
Vinyl’s flexibility makes it portable, but that same quality creates vulnerability to creasing and permanent folds. When vinyl gets bent sharply, the crease often remains visible in photos even after you try to straighten it out. Temperature extremes and direct sunlight cause the material to become brittle or fade, degrading image quality and color accuracy. Protecting your backdrops from these conditions preserves their professional appearance and your investment.
Follow these protection steps:
- Clean thoroughly before storing to remove dust, spills, and residue that can damage vinyl over time
- Roll tightly rather than folding to prevent sharp creases from becoming permanent
- Use carrying tubes or cases designed for backdrop transport to shield from folds and tears
- Avoid sharp bends by supporting the entire rolled backdrop during movement and storage
- Protect from temperature extremes by storing in climate-controlled spaces away from heat sources
- Keep away from direct sunlight to prevent fading and material degradation
- Store vertically when possible to distribute weight evenly rather than compression from stacking
When you prepare backdrops for transport, cleanliness matters first. Dust particles trapped against vinyl during rolling can scratch the surface or create visible marks in photos. A quick wipe with a microfiber cloth removes debris. For sticky residue from tape or spills, use a slightly damp cloth with mild soap and water. Always allow the backdrop to dry completely before rolling to prevent moisture-related damage.
Proper storage and transport directly impact how long your vinyl backdrops remain professional and how consistently they perform across countless shoots.
Rolling technique affects long-term storage success. Start from one end and roll tightly as you move across the backdrop, keeping tension even throughout. A loose roll develops wrinkles. An overly tight roll stresses the material and makes unrolling difficult. Aim for firm, even tension that keeps the backdrop smooth without straining it.
Carrying cases and tubes designed for backdrop transport provide specialized protection during movement. These containers prevent sharp bends that occur when backdrops shift inside a car or van. They also protect against punctures from rough handling. The investment in proper transport equipment pays for itself within a few years by preventing damage that would require replacement.
Temperature and humidity control extend backdrop longevity significantly. Extreme heat causes vinyl to warp or become permanently creased. Excessive cold makes it brittle and prone to cracking. Humidity creates mold and mildew growth. Storing backdrops in a climate-controlled studio or office space rather than a garage or outdoor shed prevents these issues. If you must store in a vehicle, avoid leaving backdrops in direct sunlight or extreme temperatures for extended periods.
Professional backdrop setup and storage practices form the foundation of a reliable photography operation. When your equipment stays in excellent condition, you spend less time managing damage and more time creating images. Your clients notice the difference between a backdrop that’s been carefully maintained and one that shows wear and visible creases.
Pro tip: Store vinyl backdrops upright in a vertical rack or hanging system rather than rolling them horizontally, as vertical storage distributes weight evenly and prevents creasing from compression over months of storage.
Below is a comprehensive table summarizing the steps and strategies for selecting and utilizing photography backdrops effectively, as described in the article.
| Aspect | Details | Considerations |
|---|---|---|
| Choosing the right backdrop | Select based on the subject, mood, lighting, and thematic purpose. | Ensure alignment between the backdrop and the subject’s characteristics, such as contrasting colors and matching textures. Ensure compatibility with lighting. |
| Enhancing texture with lighting | Use directional light to emphasize backdrop textures like fabric weave or surface grain. | Experiment with lighting angles and intensity to achieve desired texture visibility that complements the subject yet doesn’t dominate. |
| Maintaining backdrop cleanliness | Regularly clean vinyl by wiping, steam fabrics, and replace worn paper backdrops. Store backdrops properly. | A clean backdrop enhances overall professionalism and reduces editing time in post-processing. |
| Optimal subject positioning | Ensure at least three feet between the subject and the backdrop to soften shadows and reduce distractions. | Greater distance allows for better lighting arrangements while maintaining focus on the subject. |
| Selecting backdrop size | Larger backdrops offer versatility for full-body shots, group sessions, and creative framing. | Match the size to your studio space, storage capacities, and typical shooting requirements. |
| Experimenting with themes | Try various backdrop themes like textures, patterns, and colors to diversify visual storytelling. | Align backdrop themes with subject context for coherent and engaging imagery. |
| Transporting and storing vinyl safely | Roll vinyl tightly to avoid creases, keep it vertical in climate-controlled environments, and use transport cases. | Proper handling ensures longevity of the backdrop, preserving its quality for extended use. |
Elevate Your Photography with Perfect Backdrops Every Time
Struggling to find backdrops that combine durability, style, and the perfect texture for your shoots? This article highlights crucial issues like choosing the right backdrop, controlling shadows, and maintaining cleanliness—all challenges Instant Backdrops solves with its premium, ultra-realistic vinyl collections. Whether you need sturdy, stain-resistant surfaces or large sizes for versatile framing, our vinyl backdrops deliver consistent professional quality that stands up to spills and heavy editing demands.

Discover the full range of options curated specifically for product and food photography in our Aristocrat backdrop collection for product & food photography – Instant Backdrops. Embrace natural textures with our Nature backdrop collection for product & food photography – Instant Backdrops or explore every style and theme in All product photography backdrops – Instant Backdrops. Take control of your visual storytelling today by visiting Instant Backdrops and find the perfect backdrop that fits your creative vision and practical needs.
Frequently Asked Questions
How do I choose the right backdrop for different photography subjects?
Choosing the right backdrop starts with understanding your subject and the mood you want to create. For example, use soft, muted tones for portraits to highlight facial features, while clean, controlled backgrounds work best for product photography.
What lighting techniques enhance the texture of my backdrop?
To enhance backdrop texture, use angled directional light. This creates contrast between light and shadow that reveals details in the surface, making it visually appealing and dynamic.
How can I keep my photography backdrops clean and in good condition?
Regularly inspect your backdrops for dust and stains, and clean them promptly to maintain their quality. Establish a routine, such as wiping vinyl with a damp cloth or steaming fabric backdrops to keep them looking pristine before each shoot.
What is the ideal distance between my subject and backdrop to minimize shadows?
Position your subject at least three to five feet away from the backdrop to reduce harsh shadows. This distance allows you to control the lighting better and prevents distracting shadows from appearing in your final images.
Why should I invest in large backdrops for photography?
Large backdrops offer versatility for composing various shots without the need to constantly reposition. They allow for full-body portraits, environmental context, and dynamic poses without visible edges, enhancing the overall quality of your work.
How should I store and transport my vinyl backdrops?
Store vinyl backdrops rolled tightly in a protective tube to avoid permanent creases. Ensure they are clean before storage, and keep them away from direct sunlight and extreme temperatures to preserve their quality.