

How to style food photography with durable backdrops
Food photographers often struggle with messy shoots where sauces stain surfaces and backdrops buckle under moisture. You need backdrops that survive oil spills and frequent cleaning while keeping your compositions visually stunning. This guide delivers practical styling techniques that make dishes look appetizing without over-manipulation, plus backdrop recommendations built for durability. You’ll learn how fresh ingredients and strategic imperfections create authentic appeal, which camera angles showcase different foods best, and why vinyl backdrops outperform paper alternatives. Whether you’re shooting for restaurants or building a portfolio, these methods help you produce professional images that withstand both close inspection and real-world shooting conditions.
Table of Contents
- Preparing Your Food Styling Setup: Ingredients, Tools, And Backdrops
- Step-By-Step Food Styling Techniques For Appetizing Photography
- Optimizing Camera Angles And Composition For Food Photography
- Enhance Your Food Photography With Professional Backdrops
- FAQ
Key takeaways
| Point | Details |
|---|---|
| Fresh ingredients matter | Vibrant, slightly undercooked ingredients photograph better than wilted or overcooked alternatives |
| Durable backdrops essential | Vinyl backdrops at 415gsm resist stains, wipe clean easily, and lay flat without warping |
| Angle selection crucial | Overhead works for flat lays, 45 degrees suits most dishes, straight-on captures layered foods |
| Imperfection adds realism | Strategic crumbs, drips, and asymmetry make food look appetizing rather than sterile |
| Neutral colors win | Matte grey, white, black, and brown backdrops complement food without competing for attention |
Preparing your food styling setup: ingredients, tools, and backdrops
Your styling foundation determines whether your final images look professional or amateurish. Start by selecting ingredients at peak freshness, with vibrant colors that pop on camera. Wilted herbs or browning edges ruin shots before you even press the shutter. Visit markets early for the best selection, and keep backup ingredients ready since you’ll handle items repeatedly during styling.
Essential tools make precision styling possible. You need fine-tipped brushes for applying oil to create appetizing shine, tweezers for placing garnishes exactly where you want them, and cotton balls you can heat to generate realistic steam effects. A small spray bottle filled with glycerin and water creates dewiness on produce and beverages. Keep paper towels, toothpicks, and a warming tray nearby for maintaining food temperature during longer sessions.
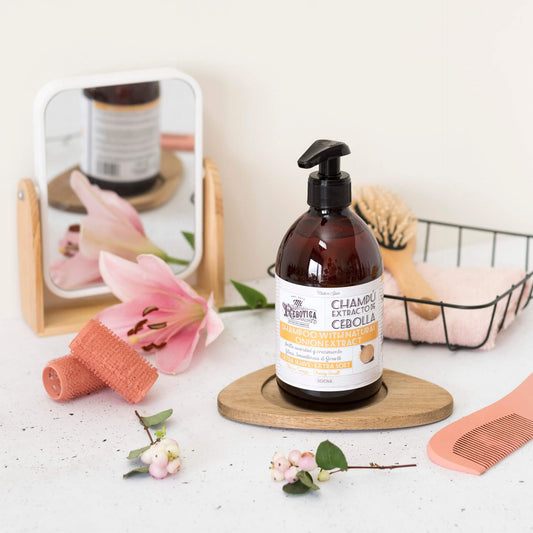
Backdrop selection directly impacts both visual quality and practical durability. Vinyl backdrops are waterproof and wipeable, with 415gsm thickness recommended for professional work that lays flat and resists warping. These surfaces handle oil spills, sauce splatters, and frequent cleaning without degrading. Wood and MDF backdrops wrapped in vinyl provide authentic texture while maintaining easy cleanup properties, though solid wood requires more careful handling to prevent permanent staining.
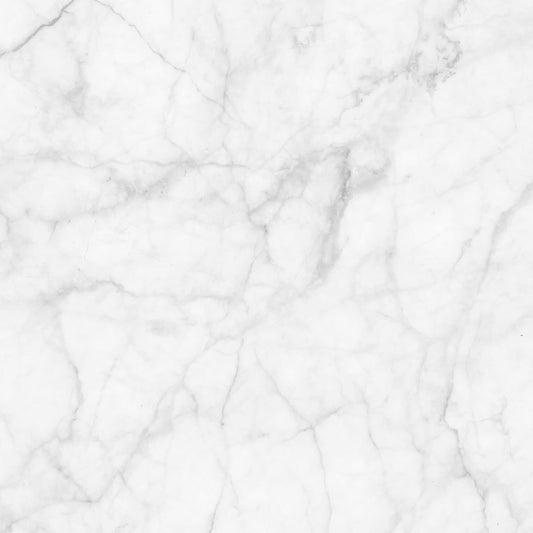
Color and finish choices matter as much as material. Neutral matte surfaces in grey, white, black, brown, or marble patterns complement food without introducing glare that competes with your subject. Glossy finishes reflect lighting equipment and create distracting hotspots in final images. Your backdrop should recede visually, letting the food dominate attention while providing context and depth.
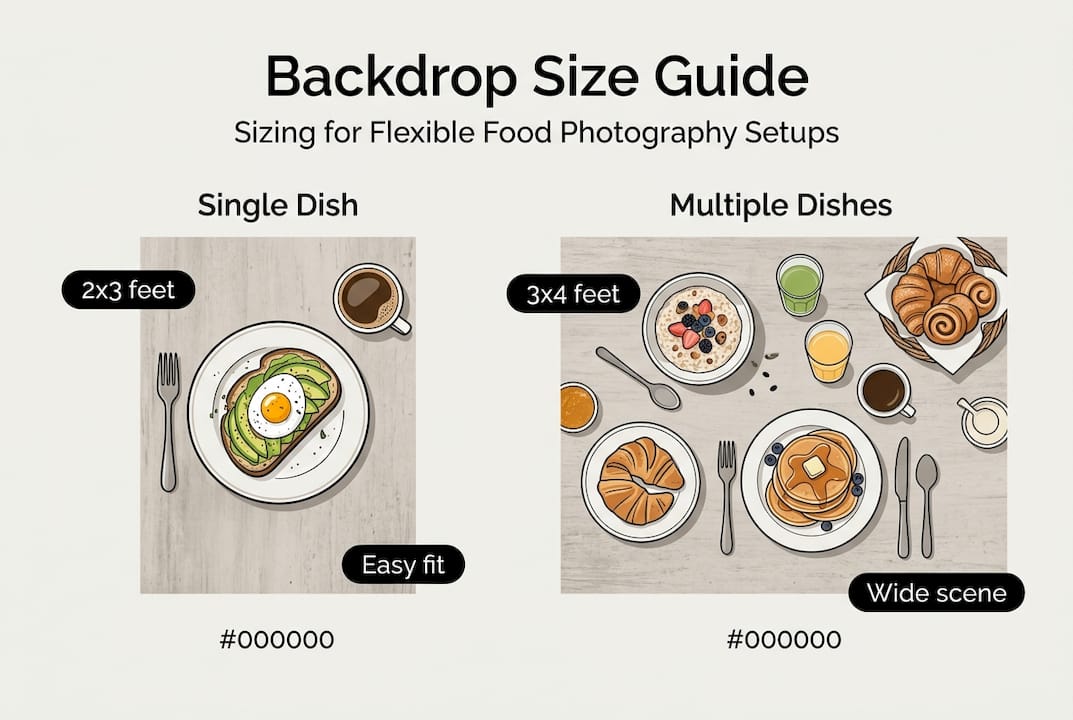
Size considerations affect composition flexibility. A minimum 2x3 foot backdrop accommodates most single dish shots and small flat lays, while larger 4x6 foot surfaces support elaborate spreads and multiple camera angles without showing edges. Larger backdrops also let you shift compositions without repositioning the entire setup, saving time during shoots with multiple dishes. For more guidance on backdrop selection, check out our food photography background tips guide.
Pro Tip: Test new backdrops with your lighting setup before a paid shoot. Some materials that look perfect in person create unexpected reflections or color casts under studio lights.
Recommended backdrop specifications for food photography
| Specification | Recommendation | Reason |
|---|---|---|
| Material | Vinyl 415gsm or vinyl-wrapped MDF | Waterproof, stain-resistant, easy cleaning |
| Finish | Matte neutral colors | Eliminates glare, complements food tones |
| Minimum size | 2x3 feet | Supports single dishes and small compositions |
| Ideal size | 4x6 feet | Allows multiple angles without repositioning |
Understanding your photography setup essentials helps you build a toolkit that handles diverse food styling challenges. Invest in quality backdrops once rather than replacing cheaper alternatives repeatedly after staining or warping ruins them.
Step-by-step food styling techniques for appetizing photography
Effective food styling balances visual appeal with authenticity, making dishes look delicious rather than artificial. Follow these steps to create images that make viewers hungry.
Step 1: Select and prepare ingredients strategically. Choose the freshest produce with vibrant colors and firm textures. Slightly undercook ingredients to preserve brightness since fully cooked foods often appear dull and lifeless on camera. Vegetables should retain their snap, and proteins should show moisture rather than dryness. Keep raw backup ingredients for elements that photograph better uncooked, like garnishes and accent pieces.
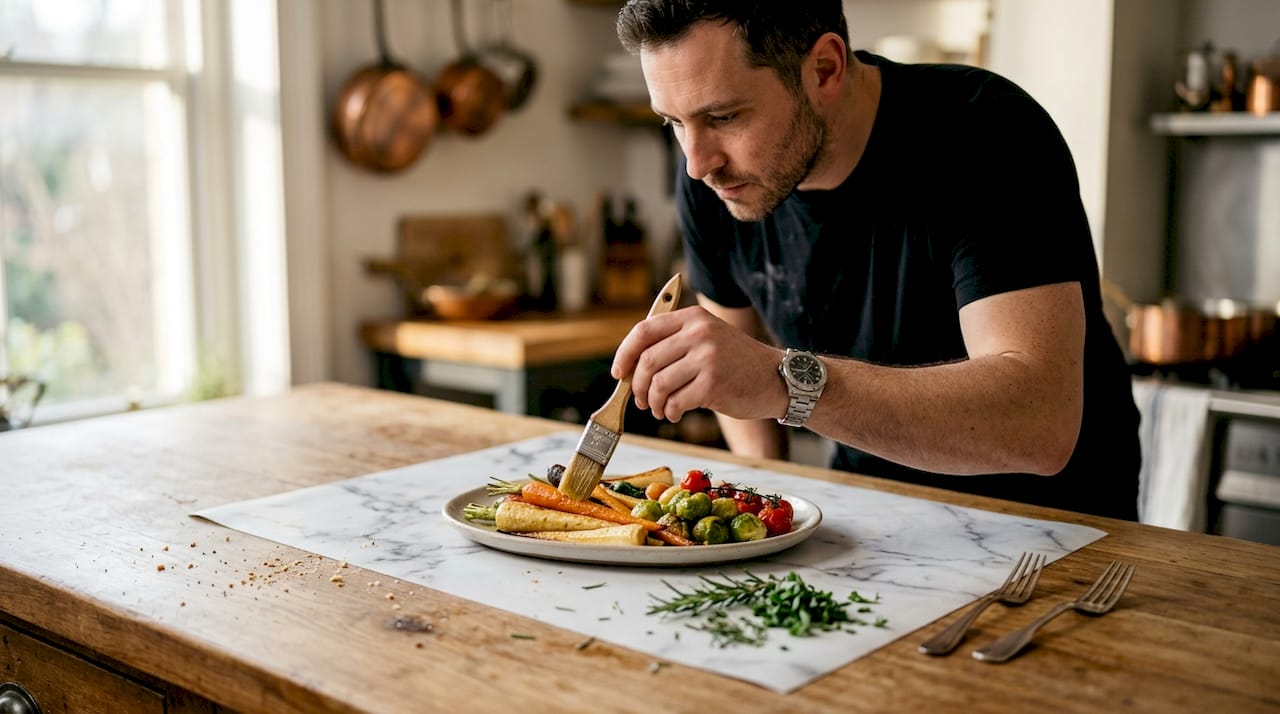
Step 2: Apply selective shine for healthy appearance. Brush foods lightly with neutral oil to create appetizing highlights without looking greasy. Focus on areas that naturally catch light, like the tops of burgers, edges of roasted vegetables, or surfaces of baked goods. Avoid over-application, which reads as artificial on camera. Different foods need different treatments: matte finishes work better for some desserts while proteins benefit from subtle sheen.
Step 3: Create atmosphere with steam and garnishes. Heat cotton balls in the microwave, then position them strategically behind or beneath food to generate realistic steam without adding moisture that wilts ingredients. Use purposeful garnishes that make sense for the dish rather than random decoration. Fresh herbs, citrus slices, or ingredient components tell a story about what’s in the food. Odd numbers of garnish elements create more natural, balanced compositions than even numbers.
Step 4: Embrace strategic imperfection. Perfect food looks sterile and unappetizing. Add intentional crumbs, drips, and asymmetry to create realism that connects with viewers. A sauce drip on the plate edge, scattered breadcrumbs near a sandwich, or slightly irregular plating makes food look touchable and real. These details trigger appetite responses that overly styled perfection suppresses.
Step 5: Arrange with precision tools. Use tweezers to position small elements exactly where you want them. This level of control lets you create seemingly casual arrangements that actually result from careful planning. Move items slightly between shots to find the most appealing configuration. Document your arrangements so you can recreate successful compositions in future shoots.
Expert nuances elevate good styling to exceptional. Spray a glycerin and water mixture on produce and beverages to create fresh-looking dewiness that photographs beautifully. Apply this treatment last since it degrades quickly. For beverages, add ice just before shooting and have backup cubes ready since they melt rapidly under hot lights. Consider using acrylic ice cubes for longer sessions, though real ice photographs more authentically for quick shoots.
“The best food photography feels effortless, but that casualness comes from deliberate choices about every element in the frame. Master the technical aspects so you can make them invisible.”
Avoid over-styling that makes food look inedible. If you wouldn’t want to eat it after styling, viewers won’t find it appetizing either. The goal is enhancing natural appeal, not creating food sculptures. Learn how backdrops impact food photography by providing context that supports rather than overwhelms your subject.
Pro Tip: Work quickly once you’ve applied final touches. Food degrades rapidly under hot lights, so have your lighting, camera settings, and composition locked before adding elements like steam, glycerin spray, or fresh garnishes.
These techniques work across different food categories, from rustic home cooking to elegant restaurant plating. Adapt the level of styling to match your subject’s character. Casual comfort food benefits from more visible imperfections, while fine dining dishes need cleaner execution with subtle rather than obvious authenticity markers. Understanding these styling fundamentals gives you flexibility to shoot any food type professionally. For additional perspective, explore our food photography background tips guide.
Optimizing camera angles and composition for food photography
Camera angle selection dramatically affects how viewers perceive and respond to food images. Different dishes demand different approaches based on their structure, height, and visual interest distribution.
Overhead 90-degree angles work best for flat lays showcasing multiple items, ingredient arrangements, or dishes where pattern and layout create the primary visual interest. This angle captures the full arrangement without perspective distortion, making it ideal for pizza, salads, charcuterie boards, and table settings with multiple elements. The overhead view also minimizes background visibility, letting you work with smaller backdrops while maintaining professional results.
The 45-degree angle suits most dishes because it shows both the food’s surface and its depth without excessive foreshortening. This versatile angle works for plated meals, bowls, sandwiches, and most main courses. It reveals layers and components while maintaining an approachable, natural perspective similar to how diners view food at a table. Position your camera at roughly eye level when seated to achieve this angle naturally.
Straight-on angles excel for tall or layered foods where vertical structure tells the story. Burgers, layer cakes, stacked pancakes, and elaborate desserts benefit from this perspective that showcases their height and internal composition. The straight-on view also works well for beverages in glasses, highlighting color gradients and garnishes. This angle requires careful backdrop selection since more background shows in the frame compared to overhead or 45-degree shots.
Backdrop characteristics influence angle effectiveness. Larger backdrops provide more flexibility for lower angles that show more background, while smaller surfaces work fine for overhead shots. Matte finishes become even more critical at acute angles where glare risk increases. Texture direction matters too: wood grain or stone patterns should complement rather than fight your composition’s flow. Consider how large backdrop sizing affects your ability to shoot from various angles without showing backdrop edges.
Camera angle recommendations by food type
| Food category | Optimal angle | Reason |
|---|---|---|
| Flat lays, pizza, salads | 90 degrees overhead | Captures full arrangement and patterns |
| Plated meals, bowls | 45 degrees | Shows depth while maintaining natural perspective |
| Burgers, cakes, layered foods | Straight-on | Highlights vertical structure and layers |
| Beverages in glasses | Straight-on or 45 degrees | Displays color gradients and garnishes |
Composition principles work alongside angle selection to create compelling images. Apply the rule of thirds by placing your main subject at intersection points rather than dead center. This creates dynamic tension that holds viewer attention longer than centered compositions. Leave negative space for text placement if shooting for commercial use, or to give images breathing room that feels sophisticated rather than cramped.
Odd numbers of elements create more natural, balanced arrangements than even numbers. Three cookies look more appealing than two or four. Five ingredients in a flat lay feel more organic than six. This principle applies across scales, from individual garnishes to complete table settings. Your eye naturally finds harmony in odd-numbered groupings.
Backdrop colors and textures should complement your lighting choices. Darker backdrops work beautifully with dramatic side lighting that creates strong shadows and highlights, while lighter neutral backgrounds suit softer, more evenly distributed light. Match backdrop warmth to your food’s color temperature: warm wood tones enhance golden baked goods, while cool grey or white surfaces make colorful produce pop. Explore creative backdrop setups to see how professionals combine angles, lighting, and background choices.
Pro Tip: Shoot tethered when possible so you can evaluate compositions on a larger screen in real time. Details that look perfect through a viewfinder sometimes reveal problems when viewed at full size, and catching issues during the shoot saves extensive post-processing work.
Master these angle and composition fundamentals, then break rules intentionally once you understand why they work. Some of the most striking food images come from unexpected perspectives that challenge conventional approaches while still serving the subject effectively.
Enhance your food photography with professional backdrops
Putting these styling techniques and angle strategies into practice requires backdrops that perform under real shooting conditions. Instant Backdrops offers durable vinyl and vinyl-wrapped MDF surfaces specifically designed for food photography’s messy reality. Our backdrops feature waterproof construction that handles sauce spills, oil splatters, and frequent cleaning without warping or staining.
We stock neutral matte finishes in grey, white, black, brown, and marble patterns that reduce glare while letting your food dominate attention. These colors complement dishes across all cuisines without competing visually. Our backdrop sizes range from compact 2x3 foot options for tight spaces to expansive 4x6 foot surfaces that support elaborate flat lays and multiple camera angles without showing edges. Every backdrop lays flat immediately, eliminating the frustration of fighting curled edges during time-sensitive shoots. Explore our collection to find backgrounds that elevate your food photography while surviving the demanding conditions of professional work.
FAQ
What materials make the best food photography backdrops?
Vinyl and vinyl-wrapped MDF provide the ideal combination of durability, appearance, and practicality for food photography. These materials are waterproof and wipeable, handling oil spills and sauce splatters without permanent damage. Wood backdrops offer authentic texture and warmth but require protective treatment and careful cleaning to prevent staining from acidic or oily foods.
How can I achieve natural-looking steam effects in food photos?
Heat cotton balls in a microwave for 30 to 45 seconds, then position them strategically behind or beneath food items using tweezers or tongs. This method generates visible steam without adding moisture that wilts ingredients or creates condensation problems. The steam effect adds warmth and freshness to images, making hot dishes look more appetizing and recently prepared.
What camera angle works best for layered foods?
A straight-on camera angle positioned at the food’s mid-height captures layered or tall foods most effectively by showcasing their vertical structure and internal composition. This perspective works perfectly for burgers, layer cakes, stacked pancakes, and elaborate desserts where height tells the visual story. Overhead or 45-degree angles compress these layers and miss the dimensional appeal that makes these foods impressive.
How do imperfect styling details improve food photography?
Intentional imperfections like scattered crumbs, sauce drips, and slight asymmetry create authenticity that connects with viewers on an emotional level. These details make food look touchable and real rather than sterile or artificial, triggering appetite responses that overly perfect styling suppresses. Strategic imperfection suggests the food was just prepared and is ready to eat, which is exactly the response commercial food photography aims to generate.