


Studio Photography Checklist: Expert Steps for Flawless Shoots
TL;DR:
- Preparation and checklists are essential for efficient, error-free studio photography sessions.
- Proper studio setup, lighting, backdrops, and subject prep ensure consistent professional results.
- Using systematic workflows and backdrops enhances creativity, productivity, and client satisfaction.
Even seasoned photographers lose shots to avoidable mistakes. A missing memory card, an uncharged battery, or a wrinkled backdrop can derail an entire session before the first frame is captured. The difference between a smooth, profitable shoot and a chaotic one often comes down to preparation. A well-structured studio photography checklist removes guesswork, reduces costly reshoots, and creates the kind of repeatable quality that clients come back for. This guide walks you through every critical stage, from pre-production planning to post-shoot wrap-up, so you can walk into any studio session with confidence.
Table of Contents
- Define your shoot concept and pre-production essentials
- Studio setup: Lighting, backdrop, and space checklist
- Subject and wardrobe preparation checklist
- Camera settings, workflow, and post-shoot wrap-up
- Why disciplined checklists elevate professional studio results
- Enhance your workflow with professional backdrops
- Frequently asked questions
Key Takeaways
| Point | Details |
|---|---|
| Plan thoroughly | A strategic pre-shoot checklist prevents missed details and keeps sessions on track. |
| Optimize studio setup | Proper lighting, backdrops, and space are non-negotiable for professional consistency. |
| Prep subjects fully | Ready wardrobe, permits, and emergency tools help avoid delays and embarrassing mistakes. |
| Refine technical workflow | Standardized camera settings, real-time review, and robust data backups lock in quality and security. |
| Use checklists for repeatability | Disciplined systems free up creative energy and minimize costly errors in the studio. |
Define your shoot concept and pre-production essentials
Every great shoot starts on paper, not in the studio. Before you touch a single piece of gear, lock in your concept. Build a mood board that captures the tone, color palette, and overall feel you are aiming for. Share it with your client, model, and any stylists involved. Everyone should be aligned before the session begins.
Once your vision is clear, move into logistics. Confirm your model, hair and makeup artists, and any assistants at least a week in advance. Double-check that all creative briefs, shot lists, and client-approved references are saved and accessible. A shot list is non-negotiable. It keeps you on schedule and ensures you deliver what was agreed.
Gear checks are where many photographers cut corners. Do not. Clean every lens the night before. Charge all batteries, including spares. Format your memory cards in the camera you plan to use, not on a computer. This step alone prevents file system errors that can corrupt your footage.
Pre-shoot planning including mood boards, model coordination, and equipment checks is critical for professional results. Plan your backup equipment as well. Bring an extra camera body if your budget allows. Pack redundant storage, whether that is extra cards or a portable drive for on-site backups.
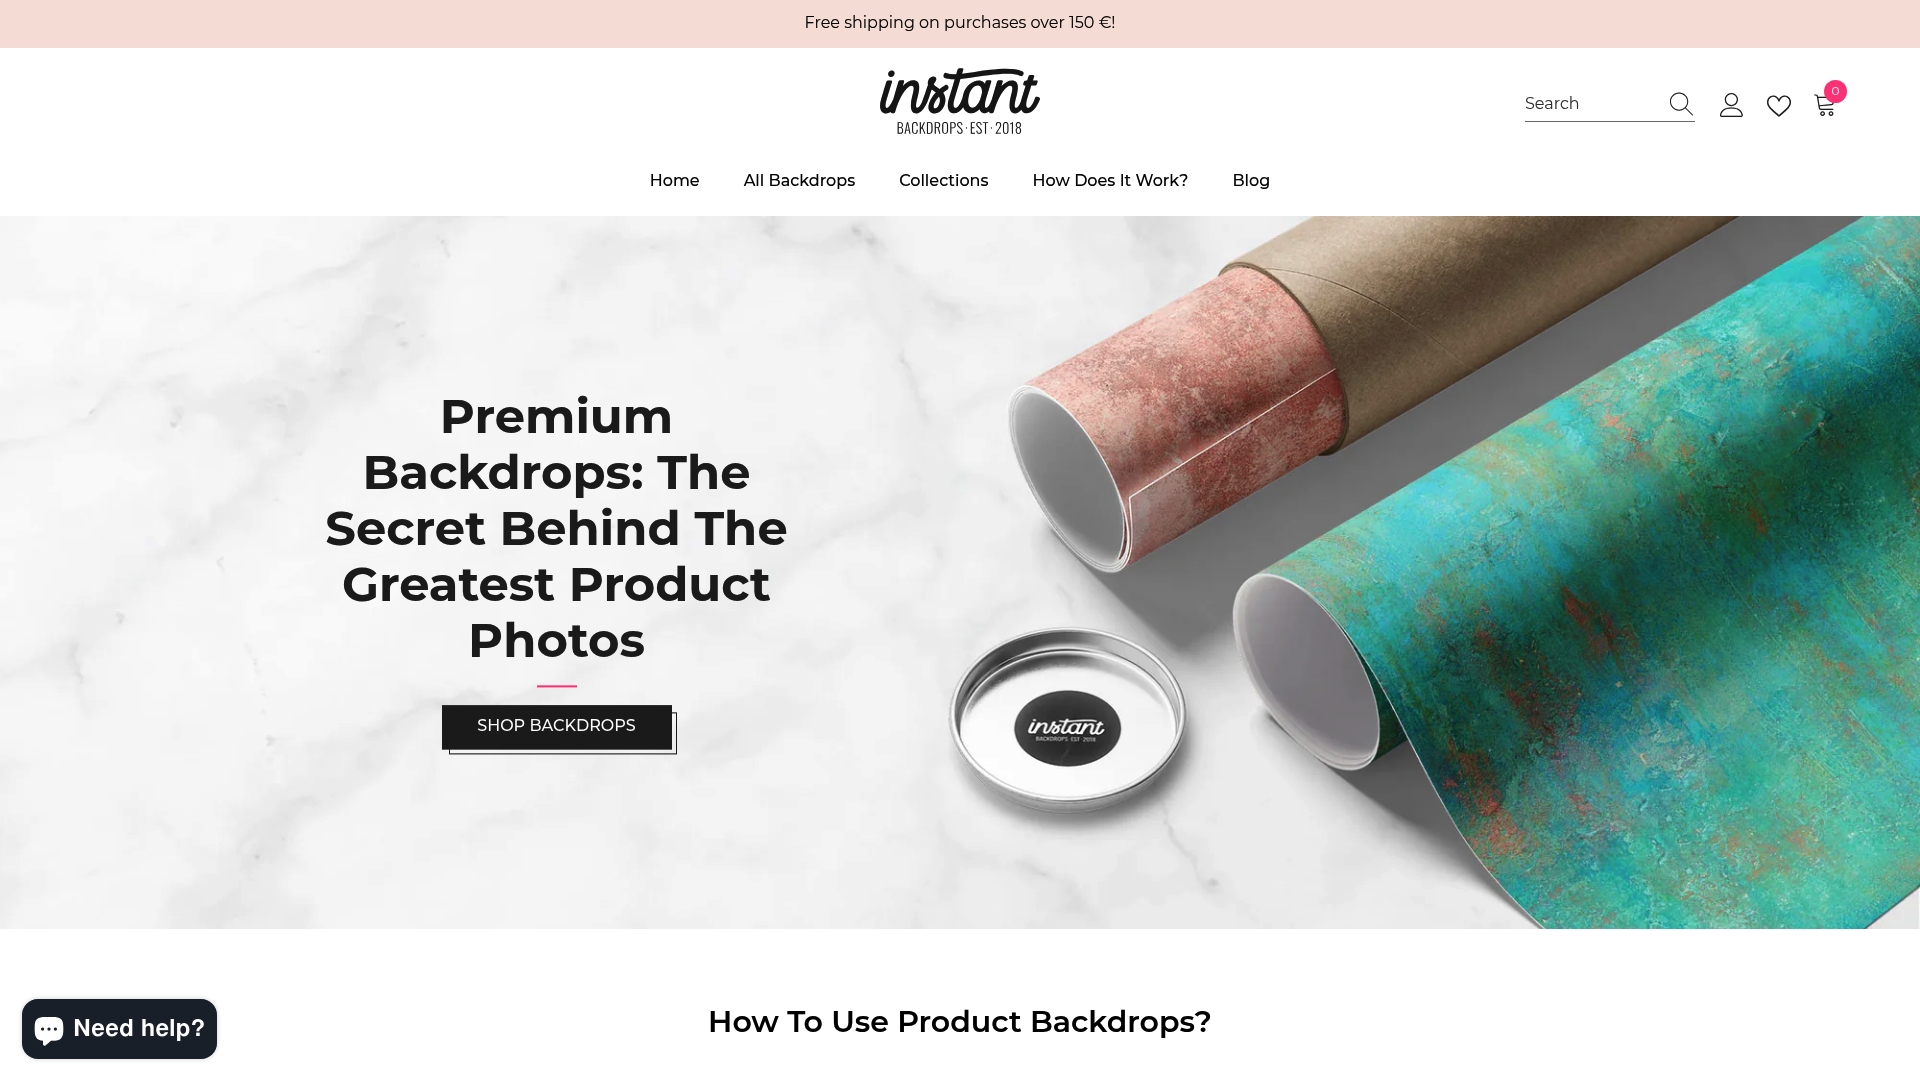
Understanding the role of backdrop early in the planning stage shapes everything from lighting placement to your color choices. If you are unsure where to begin, reading up on choosing a backdrop before the shoot saves time on set.
“Efficiency and repeatability cut errors by 50%.” Grattan Studios
Pre-production checklist:
- Finalize shoot concept and mood board
- Confirm all talent, crew, and vendors
- Prepare and share client-approved shot list
- Clean lenses and check for scratches or dust
- Charge all batteries, including flash units
- Format memory cards in-camera
- Pack backup gear and portable storage
Pro Tip: Keep a printed checklist at the studio door. Review it before you leave home and again when you arrive. Two passes cut the chance of forgotten items significantly.
Having set the stage with the importance of preparation, let’s move to what physical elements are required for your studio setup.
Studio setup: Lighting, backdrop, and space checklist
Your studio environment is the foundation everything else rests on. Getting it right before your subject walks in saves time and protects your creative vision.
Start with lighting. Key studio gear includes strobes or speedlights in the 300 to 600Ws range, large softboxes between 90 and 120cm, sturdy light stands, reflectors, and backdrop stands with clamps and sandbag weights. Do not skip the sandbags. A falling light stand can injure someone and destroy equipment in one move.
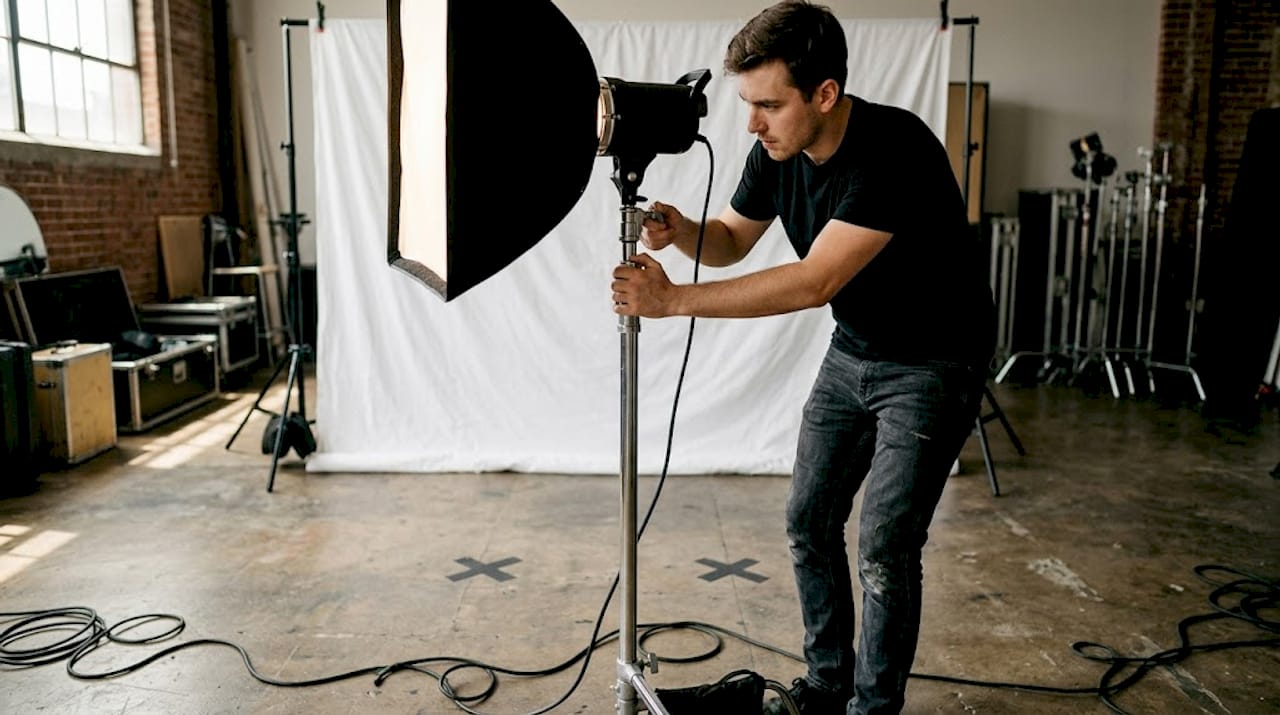
For beginners, a one-light setup with a large softbox and a reflector on the opposite side is a solid starting point. As your shoots grow more complex, expand to a three-light setup: a key light for your subject, a fill light to soften shadows, and a hair or background light to add depth and separation.
Studio lighting mechanics covering key, fill, and background light roles, strobe versus continuous options, and recommended ratios are worth studying before your first multi-light setup.
| Feature | Strobe lighting | Continuous lighting |
|---|---|---|
| Power output | High (300-600Ws) | Lower overall |
| Best for | Studio portraits, products | Video, beginner setups |
| Heat output | Low | Can run warm |
| Freeze motion | Yes, very effectively | Depends on shutter speed |
| Learning curve | Moderate | Lower |
For space, aim for at least 15 feet of depth and a ceiling height of 10 to 12 feet. This gives you room to position your backdrop 1.8 to 2.5 meters behind your subject, which is the sweet spot for avoiding shadow spill on the background.
Explore backdrop ideas for pros to see how different textures and colors serve different shoot types. For technical guidance, check out lighting tips for backdrops and the full backdrop setup guide.
Additional setup essentials:
- Extension cords and power strips rated for studio use
- UPS or backup power source to prevent mid-shoot outages
- Tethering cable and software for live review on a monitor
- Gaffer tape for cable management
- A voltmeter if you are working in an unfamiliar space
Pro Tip: Use colored tape to mark floor positions for your lights, subject, and camera. When you need to reset for a second look or a reshoot, you can rebuild the exact setup in minutes.
With your space and gear set, focus shifts to prepping your subjects for a smooth shoot.
Subject and wardrobe preparation checklist
Your subject’s appearance on camera is directly tied to how well you prepared off camera. Wardrobe and grooming surprises are among the most common causes of reshoots, and they are almost entirely preventable.
Always request a main outfit and at least one backup from your model or client. Clothes should arrive steamed or ironed. Wrinkles are brutal under studio lighting, especially in close-up shots. Bring a steamer to set as a standard item, not an afterthought.
Subject prep includes wardrobe backups, steamers, makeup and hair tools, and a lint roller. Permits and signed releases are equally important to have in hand before the session starts.
Wardrobe and subject checklist:
- Confirm main outfit and backup with client
- Steam or iron all garments before the shoot
- Use antistatic spray on synthetic fabrics
- Have a lint roller and fabric tape on hand
- Confirm makeup and hair artist arrival time
- Collect signed model releases and any required permits
- Build short breaks into the schedule for wardrobe changes
For bigger productions, knowing the advantages large backdrops bring becomes especially relevant. A large backdrop gives models more room to move naturally, and it reduces edge bleed in wide shots. If you are working with decorative or textured backgrounds, the decorative backdrops guide covers styling techniques that pair well with different wardrobe styles.
Portable fix kit essentials:
- Safety pins and fashion tape
- Spare socks and neutral undergarments
- Blotting papers for on-set shine control
- Wet wipes and stain remover pen
- Hair clips and a small mirror
Pro Tip: Pack a session survival kit in a small zippered bag. Keep it in your camera bag at all times. The first time you need a safety pin on set and have one ready, you will never leave home without it again.
After prepping your subjects and set, attention turns to the technical side: dialing in camera settings and on-set workflow.
Camera settings, workflow, and post-shoot wrap-up
Your camera is only as good as the settings you give it. Studio photography rewards precision. Get your baseline dialed in before your subject steps in front of the lens.
Always shoot in RAW format. It gives you far more flexibility in post-processing than JPEG, especially for color correction and exposure recovery. Set your ISO between 100 and 200 to keep noise minimal. Use an aperture between f/5.6 and f/11 for sharp focus across your subject plane. Set your shutter speed to 1/125s to sync cleanly with your strobe. Use a custom white balance or set it to the flash preset.
Recommended camera settings for studio work include RAW capture, ISO 100 to 200, aperture f/5.6 to f/11, 1/125s flash sync, and 50 to 85mm prime lenses for portraits and product work.
| Shoot type | ISO | Aperture | Shutter speed | Lens |
|---|---|---|---|---|
| Portrait | 100 | f/8 | 1/125s | 85mm prime |
| Product | 100 | f/11 | 1/125s | 50mm prime |
| Fashion | 200 | f/5.6 | 1/125s | 85mm prime |
| Creative/editorial | 200 | f/5.6 to f/8 | 1/125s | 50 to 85mm |
Tethering, a color checker, and the 3-2-1 backup method are essential for accuracy and data security in professional sessions.
In-shoot workflow steps:
- Capture test exposures and review on a tethered monitor
- Confirm sharpness, lighting ratios, and backdrop exposure
- Use a pose guide for subjects unfamiliar with studio work
- Flag selects in real time with tethering software
- Communicate with your subject to maintain energy and connection
Post-shoot steps are just as important. Back up your files using the 3-2-1 method: three copies, on two different types of storage, with one stored offsite or in the cloud. Clean the studio and return gear to its marked position. Deliver a set of preview images to the client within 24 hours. Run a test print to check color accuracy before sending finals.
A strong backdrop makes the power of backdrops clear from the first frame. For product work, well-chosen backgrounds directly affect how shoppers perceive value, which is why e-commerce backdrops are a smart investment for commercial photographers.
Pro Tip: Use a color checker card in your first test shot. Match it in post and apply the correction as a preset across your whole shoot. This saves hours of manual color grading.
Having mastered the shoot, it is time to reflect on the broader impact of systematic checklists for professional consistency.
Why disciplined checklists elevate professional studio results
Here is an opinion many photographers resist: checklists are not a creativity killer. They are the opposite. When your brain is not burning energy trying to remember whether you charged the second battery pack or confirmed the model release, it is free to focus on the shot in front of you.
Commercial photography demands consistency. Clients return when they can count on the same quality shoot after shoot. Floor marks, saved presets, and structured systems make that possible. Structured checklists cut errors by 50% or more through repeatable organization. That is not a small gain.
The most expensive mistakes in studio work are almost never creative ones. They are logistical. A power outage because you skipped a UPS. A reshoot because the backdrop shifted and no one marked its position. A lost shoot because files were not backed up before a card failed. Every one of these is preventable.
Pro shooters treat structure as a creative tool. A reliable studio backdrop setup guide is the same idea applied to your environment. When your setup is locked in and repeatable, you can take creative risks knowing the fundamentals are handled. That is the real value of working from a checklist.
Enhance your workflow with professional backdrops
Your checklist covers the process. The right backdrop completes the picture. At Instant Backdrops, we offer high-quality vinyl backdrops that are durable, stain-resistant, and built to hold up under the demands of professional studio work. Whether you shoot portraits, products, or editorial content, having the right background cuts setup time and keeps clients satisfied.
Explore our solid and gradient backdrops for clean, distraction-free results. Browse the tile backdrops for bold, textured options that add depth without overwhelming your subject. And check out the wall backdrops collection for realistic architectural backgrounds that suit everything from fashion to lifestyle shoots. The right backdrop is one less thing to worry about on shoot day.
Frequently asked questions
What is the most important item in a studio photography checklist?
Reliable lighting and backdrops with proper stands and clamps form the core of any professional studio setup. Without these two elements dialed in, everything else is secondary.
How do I choose between strobe and continuous lights for studio shoots?
Strobes deliver more power and a wider dynamic range, making them the preferred choice for most studio pros. Continuous lights work better for video work or beginners who need instant visual feedback.
What studio space size is ideal for full-length portraits?
A studio depth of 15 feet and a ceiling height of 10 to 12 feet give you enough room to separate your subject from the backdrop and position lights without compromise.
How can I make my workflow more efficient for repeated commercial shoots?
Floor marks and structured checklists help you rebuild the exact same setup faster every time, cutting errors by 50% or more across repeated sessions.
What should I do post-shoot to protect my work?
Apply the 3-2-1 backup method immediately after your session, then clean the studio, reset gear to its marked position, and send preview images to the client within 24 hours.